Are you someone who is working as a WordPress Developer for a long time? OR Are you someone who is an owner of an IT organization that provides customized WordPress solutions to clients around the globe? If any of your answers are YES, then you must be knowing about the issue related to Bulk Upload Images To WordPress Media Library.
For those who don’t know, the WordPress ecosystem does provide you with built-in functionality for Bulk File Upload. However, WordPress sites have an upload limit of 2MB, and as you all know that, when you’re using HD images for your website, you may easily surpass this limit. If you need any assistance, you can always opt to hire WordPress developers to get your job done.
There are only two significant scenarios when you can’t directly upload the media files to the WordPress Media Library :
- Files which are more significant than 2MB.
- Hundreds of media files posted individually.
For the rest of the scenarios, this solution works well.
Now, you all may be thinking that How To Bulk Upload Files To WordPress when the media file size is greater than 2MB, isn’t it? Don’t worry. There is a solution for that as well.
There are two types of methods that you can opt for bulk file upload in WordPress:
- Method 1: Bulk Upload Files To WordPress Via FTP
- Method 2: Bulk Upload Files To WordPress Via cPanel
So, let’s get the things underway and analyze each method one-by-one in detail.
Method 1: Bulk Upload Files To WordPress Via FTP
One of the most popular as well as natural methods for bulk upload files is to Add Files To WordPress Media Library Via FTP. With FTP coming into play, you can upload thousands of HD images to your WordPress Media Library without worrying about its size.
However, over the years we have seen many developers who know FTP as a possible solution for bulk file upload, but still not able to solve the issue. Their WordPress FTP Images are Not Showing In Media library.
The reason behind that is, just uploading the image files to the server via FTP is not your ultimate solution. You also need to register those files to your WordPress site. To solve your burning question, we have provided a step-by-step guide.
Connect To Your Site Via FTP
The very first thing that you need to do to perform bulk file upload is to connect your WordPress website to the server via FTP. For that purpose, you will need two things – [1] FTP Username & Password and [2] An FTP Program.
Now, if you don’t know the username and password for FTP, you can contact your hosting provider and get it done. Coming to the FTP Program, there are many options. However. FileZilla is a great free option, and we’re also using that for our organization’s website.
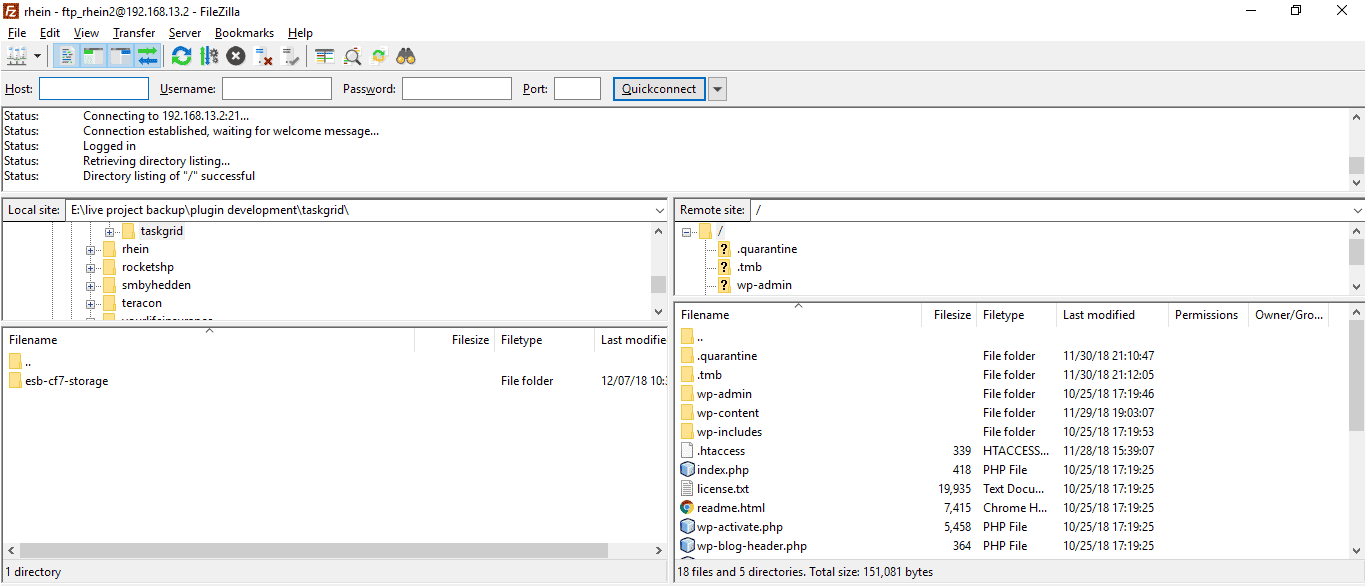
Now, open your FTP program and enter your credentials at the top as shown in the screenshot below.
Here’s what the various input means:
- Host – The actual URL to your website.
- Username – Username of your FTP account.
- Password – Password of your FTP account.
- Port – Specific port required by your host.
Click on the ‘Quickconnect’ button which will establish the connection of your website with the server through FTP.
Upload Files To wp-content/uploads Folder
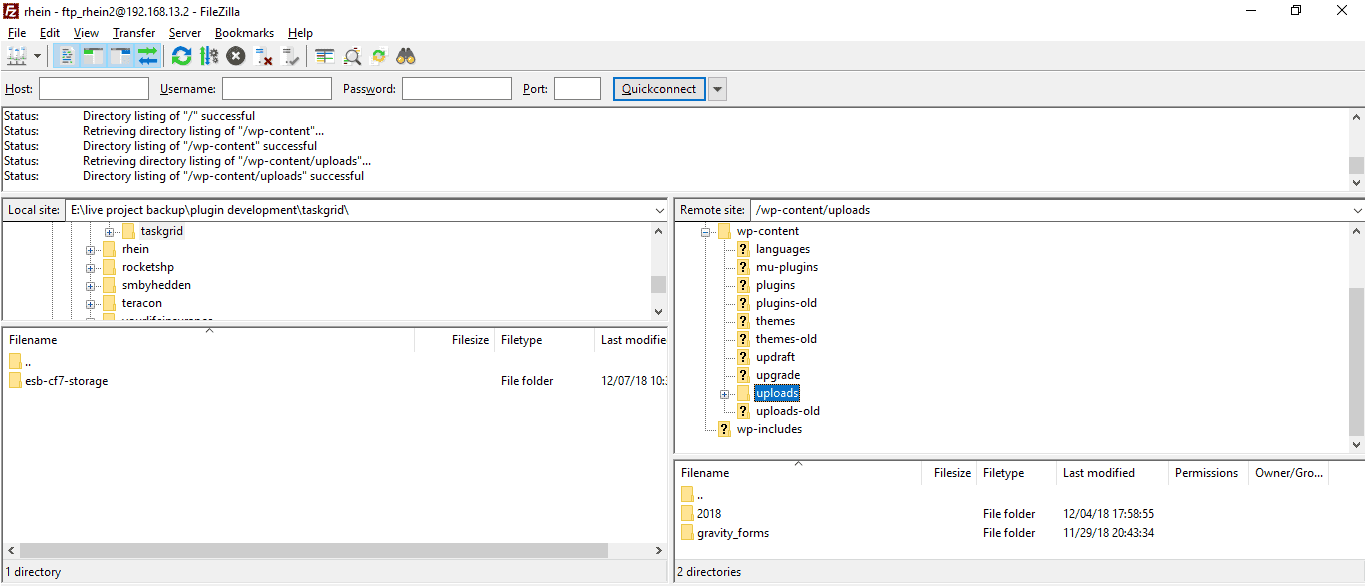
To upload the files to your WordPress website, you need to browsethe ‘wp-content/uploads’ folder on your server. For that purpose, use the folder tree of your FTP program as shown in the screenshot below.
Now, there are three possible ways to upload your files to the WordPress ecosystem:
- Uploading files directly to ‘wp-content/uploads’ folder
- Utilizing the ‘date folder’ that WordPress automatically creates
- Creating your folder
Just remember one thing that you should upload your files in the uploads folder or in a subfolder of that folder. Now, to upload the files, drag them from the Local Site tab to the Remote Site tab as shown in the screenshot below:
Install Add From Server Plugin
As we have discussed earlier that many WordPress developers know FTP is for bulk file upload. However, there are very few who know the proper method of How To Upload Images To WordPress Media Library via FTP. Those people will get their solution in this step.
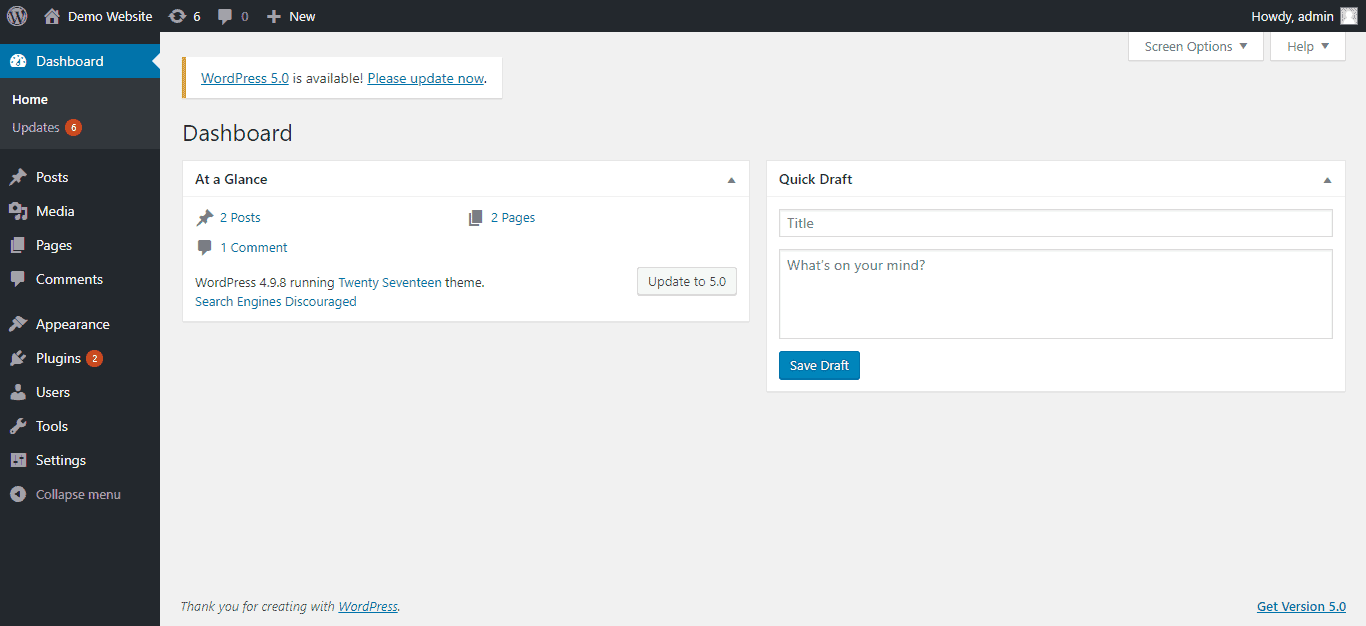
They should directly jump to this step. No need to follow Step 1 & Step 2. Now, first of all, move to your WordPress Admin Dashboard as shown in the screenshot below.
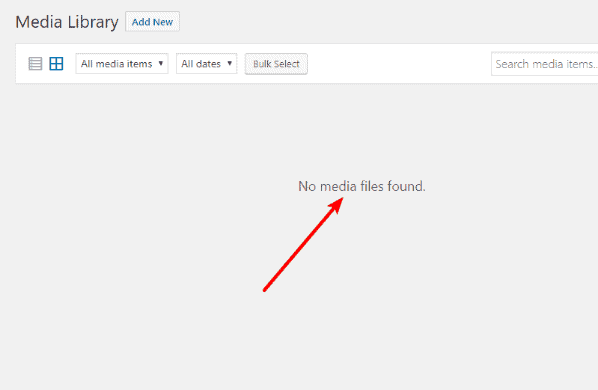
After that, move to Dashboard >> Media as shown in the screenshot below.
Here, you would be expecting that all files you uploaded would be in this tab. However, there is nothing found as shown in the screenshot above.
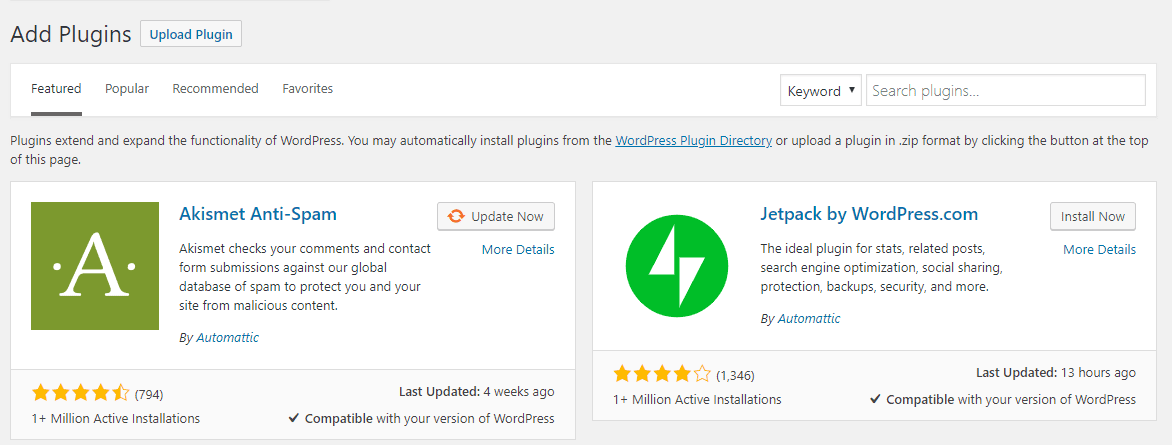
Let’s fix this issue by making use of Add Form Server, one of the most excellent WordPress Bulk Image Upload Plugins which will help you to register all the media files. To install this plugin, move to Dashboard >> Plugins >> Add New as shown in the screenshot below.
Now, search ‘Add From Server’ as shown in the screenshot below.
Once you find the plugin, click on ‘Install Now’ button which will complete the installation process. The last task is to activate the plugin. For that purpose, click on the ‘Activate’ button as shown, which will seal the deal for you.
Import Files To WordPress Media Library
In the earlier step, you have installed the ‘Add From Server’ plugin. Now, it’s time to utilize that plugin in your WordPress website for Importing Media Files From Server. For that purpose move to Dashboard >> Media >> Add From Server as shown in the screenshot.
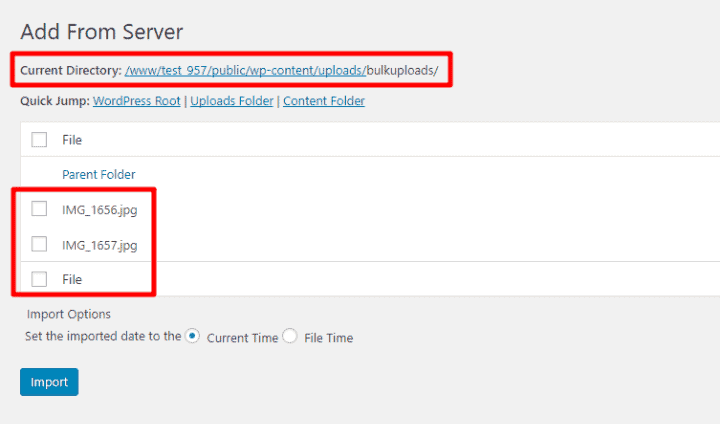
Here, you will find the listing of all the folders/files in the wp-content folder. Now, click on the Uploads Folder link which will redirect to a whole new window as shown in the screenshot.
After that, browse to the folder where you uploaded your files via FTP. Once you reach that folder, you will see a list of all the media files as shown in the screenshot below.
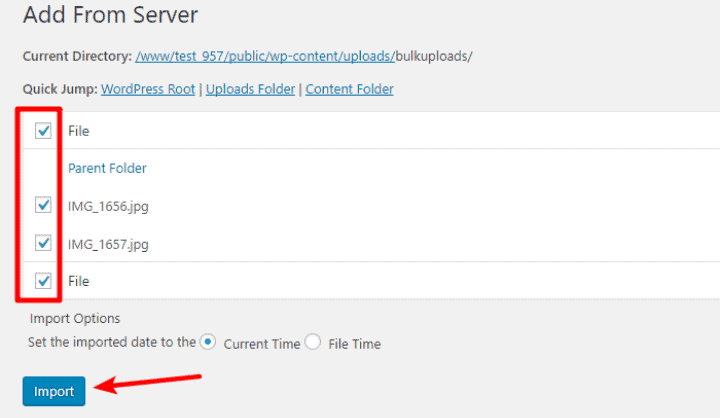
Now, utilize the checkbox to select all the files or individual files as per your need. Once you’re done with that, click on the ‘Import’ button as shown in the screenshot below.
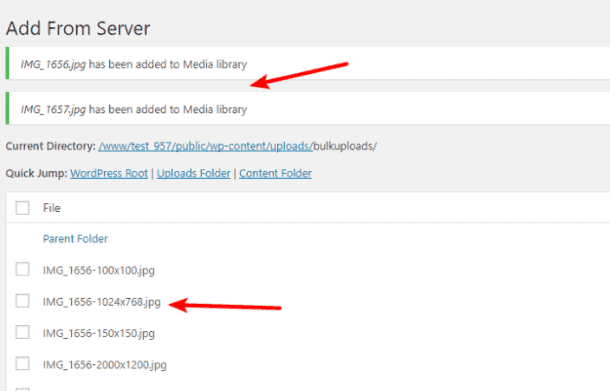
Depending on how many image files you want to import, the process may take a little while. However, once the process finishes, you’ll see a success message as shown in the screenshot.
Remember that all WordPress images will have the default size. So, in order to have your image in the original size, you need to make changes by using the WordPress editor.
In the end, you will see all those files in your Media library as shown in the screenshot below.
WP-CLI As An Alternative To Add From Server Plugin
This method is not friendly for beginners. However, if you’re an experienced WordPress developer, you can opt for this method. You can also say that this is a method for WordPress Upload File to Media Library Programmatically.
For this purpose, you need to use the wp media import command. The great thing about this method is that it provides you with a lot more flexibility compared to Add From Server plugin.
With this command, you can automatically assign a title, caption or alt text for media files. You can also attach a file to a specific post and import files from other websites to your media library.
So, if you’re a technical geek, give this option a try.!
Method 2: Bulk Upload Files To WordPress Via cPanel
If you’re not able to connect your WordPress website to the server via FTP for Sync Media Library with Uploads Folder, then there are 2 other methods to solve the problems of bulk file upload. One of them could be connecting your site to the server via cPanel, if your host allows that and then, utilizing the Add From Server plugin as we have seen earlier.
Read also: 10 Reasons To Stop Usage Of Nulled WordPress Themes & Plugins
Here’s a step-by-step guide for that.
Connect To Your Site Via cPanel
The first thing you need to do is to connect your WordPress website to the server via cPanel. For that purpose, log into your cPanel with the appropriate credentials. Now, try to find the ‘File Manager’ option in your cPanel dashboard as shown in the screenshot below.
Once you find that, click on ‘File Manager’ option which will redirect you to a whole new webpage where you’ll be able to see an ‘Upload’ option as shown in the screenshot below.
By clicking that option, you will be able to upload all the media files. However, you’ve to upload all the files one-by-one. Here, there is no option for bulk upload. Remember that you’ve to upload all your media files to the wp-content/uploads folder.
Utilizing Add Form Server Plugin
The second and last step is to use the Add From Server plugin for registering the image files. For that purpose, you need to follow STEP 3 & STEP 4 of Method 1. Once you complete both these steps, you’ll be to view all the media files in your WordPress Media Library.
When To Use Which Method?
After reading both methods for bulk file uploads to your WordPress website, you must have got an idea of how both the methods work. However, many of you may still have a doubt regarding when to use which method, isn’t it? So, let us make it easier for you.
If you want to enjoy the advantage of uploading bulk media files that exceeds the WordPress upload limit, then you should opt for the FTP method.
However, if you want to upload a single large media file and you don’t have the advantage of FTP, then you should opt for the cPanel option.
Conclusion
Nowadays when most businesses are utilizing a huge chunk of media files for their website, they need to know that methods for uploading bulk media files have reached a new level.
Taking this scenario into account, here we have provided you with a step-by-step guide on ‘How to bulk upload files to your WordPress Website’ which will be really helpful to any Custom WordPress Development company across the globe.
If you still have any doubts regarding this subject, then feel free to ask them in our comment section. We’ll try to respond to each of your queries. Thank You.!
Are you frustrated with bulk upload file issue on your WordPress website? Do you want to solve it? Then, why are you waiting for anything to happen? Connect with eSparkBiz Technologies, a Top-Notch Custom WordPress Development Company which provides high-quality solutions.

