Node JS is an open-source runtime JavaScript framework used to provide a highly efficient and reliable environment to the applications without any need of a web browser. Today, we will talk about how to Build A Shopify App With Node.js in detail.
With a better compiler and easy to use UI, the latest Node JS is more capable and reliable than previous versions of the Node JS.
Node JS is primarily designed to build web and mobile applications. Moreover, if you are looking for an app that performs well and responds better than others, we will suggest you try to connect with Top Node JS Web Development Company.
Additionally, if you were planning to build a Shopify App with the latest standards and usability tweaks, the Node JS would be a worthy option for you to go with.
Building A Shopify App With Node.js in 2024
Shopify is undoubtedly a great choice for new business owners. However, there are still a few features that lack in the default features-list of Shopify. It will help you to Build Shopify App.
These features generally include the advanced ones and if you are starting a business then there are chances that you won’t notice any flaw in Shopify.
In this guide, our certified team of programmers has discussed how to make a more useful and advanced Shopify App alternative that you can use. So, let’s get started.
Step 1: Install Node.js
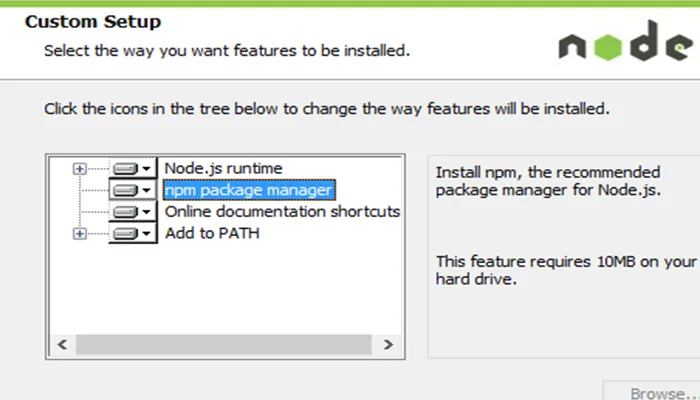
The first step to build a new customised and improved Shopify app is to install the latest Node JS to your system.
In case you don’t have the Node JS installed on your PC, you can download or update to the latest stable node.js version you can download or update to the latest stable node.js version by their official page, https://nodejs.org/en/download/
To follow the steps as discussed here, we will suggest you download the version newer to 8.1.0.
If you aren’t sure that which version of Node JS you are running, you can check it by using the following command
node –v : Additionally, if you already have a version of Node JS but do not have the said version, then you need to update the Node Js framework before proceeding further. Here are the steps you need to follow to update Node JS through the command prompt.
npm update : The next thing to consider is to prepare the system to develop a perfect Shopify alternative. So, here’s a list of some essential node packages that you should have in your PC.
- cookie
- dotenv
- body-parser
- MySQL
- Shopify Node API
- crypto
- nonce
And in order to get the above-listed elements installed, you will need to enter the following command.
npm install nodemon cookie dotenv body-parser mysql shopify-api-node crypto nonce -save
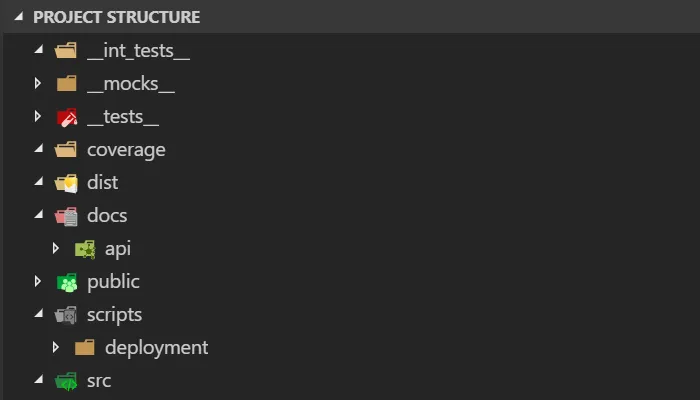
Step 2: Create A Project Folder & An Index.js File
The next step is to create an Index file for your app
Commands to be followed are:
npm install
Code for index.js is as follows:
const crypto = require('crypto');
const nonce = require('nonce')();
const request = require('request-promise');
const querystring = require('querystring');
const cookie = require('cookie');
const express = require('express');

const app = express();

app.get('/shopify-api', (req, res) => {
    // Shop Name
    const shopName = req.query.shop_name;
    if (shopName) {

        const shopState = nonce();
        // shopify callback redirect
        const redirectURL = process.env.TUNNEL_URL + '/shopify-api/callback';

        // Install URL for app install
        const shopifyURL = 'https://' + shopName +
            '/admin/oauth/authorize?client_id=' + process.env.SHOPIFY_API_KEY +
            '&scope=' + process.env.SCOPES +
            '&state=' + shopState +
            '&redirect_uri=' + redirectURL;

        res.cookie('state', shopState);
        res.redirect(shopifyURL);
    } else {
        return res.status(400).send('Missing "Shop Name" parameter!!');
    }
});

app.get('/shopify-api/callback', (req, res) => {
    const {shopName, hmac, code, shopState} = req.query;
    const stateCookie = cookie.parse(req.headers.cookie).state;

    if (shopState !== stateCookie) {
        return res.status(403).send('Request origin cannot be verified');
    }

    if (shopName && hmac && code) {
        const queryMap = Object.assign({}, req.query);
        delete queryMap['signature'];
        delete queryMap['hmac'];

        const message = querystring.stringify(queryMap);
        const providedHmac = Buffer.from(hmac, 'utf-8');
        const generatedHash = Buffer.from(crypto.createHmac('sha256', process.env.SHOPIFY_API_SECRET).update(message).digest('hex'), 'utf-8');

        let hashEquals = false;

        try {
            hashEquals = crypto.timingSafeEqual(generatedHash, providedHmac);
        } catch (e) {
            hashEquals = false;
        }

        if (!hashEquals) {
            return res.status(400).send('HMAC validation failed');
        }
        const accessTokenRequestUrl = 'https://' + shopName + '/admin/oauth/access_token';
        const accessTokenPayload = {
            client_id: process.env.SHOPIFY_API_KEY,
            client_secret: process.env.SHOPIFY_API_SECRET,
            code,
        };

        request.post(accessTokenRequestUrl, {json: accessTokenPayload})
            .then((accessTokenResponse) => {
                const accessToken = accessTokenResponse.access_token;
                const shopRequestURL = 'https://' + shopName + '/admin/api/2020-04/shop.json';
                const shopRequestHeaders = {'X-Shopify-Access-Token': accessToken};

                request.get(shopRequestURL, {headers: shopRequestHeaders})
                    .then((shopResponse) => {
                        res.redirect('https://' + shopName + '/admin/apps');
                    })
                    .catch((error) => {
                        res.status(error.statusCode).send(error.error.error_description);
                    });
            })
            .catch((error) => {
                res.status(error.statusCode).send(error.error.error_description);
            });

    } else {
        res.status(400).send('Required parameters missing');
    }
});

app.listen(3434, () => console.log('Application listening on port 3434!'));
Step 3: Install Ngrok to Create A Tunnel From Public Internet
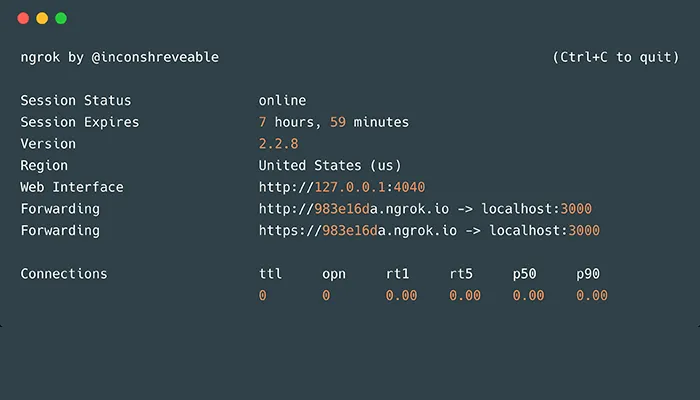
It is important that the app you are planning to build makes API Call. In other words, the app will need SSL to make the call. And to do this, you will need to use ngrok. By using the ngrok, you can point the SSL URL directly to your localhost.
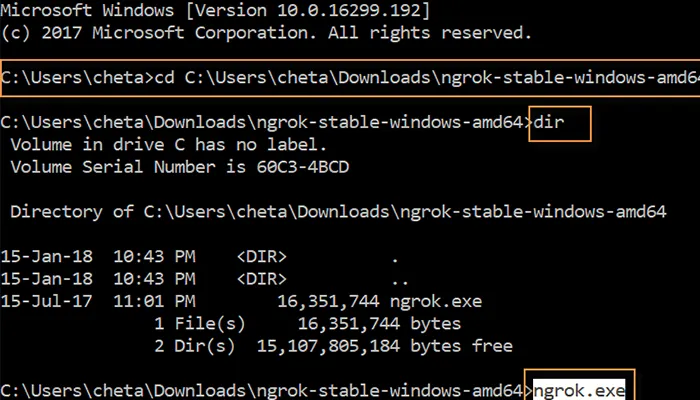
The first step will be to download the ngrok from its official webpage, https://ngrok.com/download
The page has an executable file that you can easily install like any other app and setup.
Now run the ngrok.exe and use the command ngrok
Step 4: Login To Your Shopify Developer Account
The next step is to login to your Shopify Developer Account using the app name and URL (generated in Step 3)
Here, you will need to enter the ngrok URL on the App URL field and for the Whitelisted URL; you need to add the same with the /shopify/callback at the end of the URL.
Step 5: Shop Secret Key To Authenticate App
Now, shop for the secret key for your app by navigating to your app page and clicking on the “App Setup” and there are certain things you must know about node.js as well.
Step 6: Update The Shopify API Key & Secret Key
You will get the Shopify API key and Shopify Secret key from the window on the Shopify developer page along with the Shopify Access Token. You can update and keep it safe from there.
Update the shopify key and secret key in index.js.
Step 7: Using Ngrok URL With The Shop Name
Use the ngrok URL along with your node shop name like
https://c654462e.ngrok.io/shopify?shop=abc.myshopify.com
By following these steps, you can easily build a perfect Shopify app that fulfils all your needs and provides the users with a great interface and experience.
So, try the above-listed steps and get the best in class eCommerce application based on the Shopify principles.
Building A Shopify App With Express
Here in this section, we have elaborated all the processes which developers are supposed to do to Build Shopify App.
In addition, we also have provided a coding part for developing an application that changes the online store’s theme by creating a new JC-page integrated with the Google Map features that point to the store pin location.
Prerequisites for Building an App Similar to Shopify
In order to build a modified Shopify app using the Node JS and Express Framework For Enterprise Application , there are a few prerequisites that your system needs to fulfil. So, before jumping to build the app, let’s have a look at these things.
The first thing that you are going to need is to register yourself to Shopify. This will help you access the partner dashboard that will contain all the information regarding your app and URL.
There are certain things that you need to consider while dealing with app authorization. Also, there are a few node packages that you should have in your system. These packages are
- Nodejs
- Express
- Express generator
- Dotenv
- Shopify-node-api
- ngrok
Step 1: Making App Accessible Via the Internet
Now to make your app working, it is essential to make it accessible via the internet. So, here’s how you are going to achieve it.
Download ngrok from its official download page.
Go to the directory and execute the following command
- ngrok http 3000 (For MacOS and Linux systems)
- ngrok http 3000 (for the systems running on Windows)
Step 2: Making App Scaffold
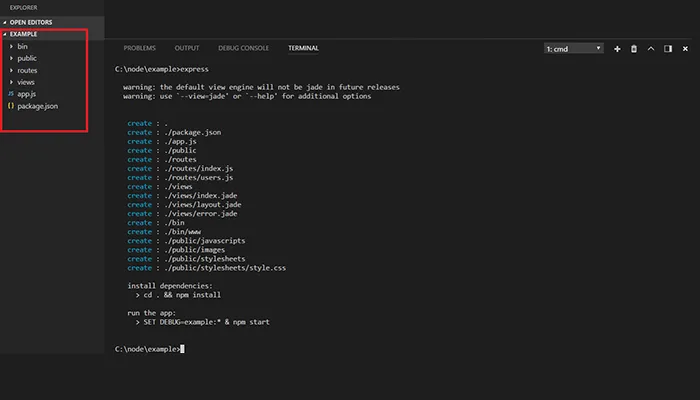
Run the following commands in the application directory generate app scaffold
$ npm install express-generator -g
$ express--view=pug
Delete unnecessary user files by using the following command
./routes/users.js
Update file. /app.js and erase unused code
var users = require(‘./routes/users’);
app.use(‘/users’, users);
Create new files:
./.env – configs.
./routes/jctest.js – routes.
./services/shopify-stores.js – routes.
Update ./app.js with highlighted code:
var jctest = require(‘./routes/jctest’);
app.use(‘/jtest’, jtest);
Install dotenv module to work with .env file:
npm install dotenv –save
Update ./app.js by using the following codes
var dotnev = require(‘dotenv’);
dotenv.config();
Install shopify-node-api module in Shopify Admin API by the following command
npm install shopify-node-api –save
Step 3: Application Settings
Navigate to your Shopify partner dashboard and get the app details by going to the “Apps” Tab.
Here, you can get your app credentials that are amongst the most important things to Build A Shopify App.
Next, copy the API key and the Secret key to the .env file as
API_KEY=YOUR-API-KEY
API_SECRET=YOUR_API_SECRET
APP_URL=YOUR_APP_URL
The next big thing is to set up the app’s URL and other information. To do this; navigate to the “Apps” tab and click on “App Info”.
Here, you will need to enter the app URL and name along with the Whitelisted redirect URL.
In app URL, type
https://#{app_url}>/jctest/install
In the field, whitelisted URL, type
https://#{app_url}/jctest/auth
Step 4: Implementation Of Main Application Logic
Now, it is the right time to Build Shopify App to the real world conditions.
The following module will help you save authorization data and map configuration for your store. So, go through them and make the necessary adjustment in the code, if needed.
For shopify-stores.js
const ShopifyAPI = require('shopify-node-api');
const mapStyles = require('./map-styles');
module.exports = {
   stores: {},
   mapConfiguration: {},
   install (storeOptions) {
       let store = this.stores[storeOptions.shop];
       if (!store) {
           store = new ShopifyAPI(storeOptions);
           this.stores[storeOptions.shop] = store;
       }
       return store;
   },
   shopNameFormater (shop){
       return shop.replace(/https?:///, '');
   },
   getStore (shop) {
       shop = this.shopNameFormater(shop);
       return this.stores[shop];
   },
   saveMapConfiguration (shop, configurations) {
       shop = this.shopNameFormater(shop);
       let mapConfigurations = this.mapConfiguration[shop];
       if (!mapConfigurations) {
           mapConfigurations = {};
           this.mapConfiguration[shop] = mapConfigurations
       }
       mapConfigurations.mapApi = configurations.mapApi;
       mapConfigurations.location = configurations.location;
       let mapStyle;
       if (configurations.mapStyle){
           mapStyles[configurations.mapStyle]
       } else if(configurations.mapStyleCustom){
           mapStyle = JSON.parse(configurations.mapStyleCustom);
       }else{
           mapStyle =mapStyles[Object.keys(mapStyles)[0]];
       }
       mapConfigurations.styles = mapStyle;
       return mapConfigurations;
   }
}
Here, install method saves a new store connection as well as returns the existing shop connection.
- storeOptions is used to create ShopifyAPI instance
- getStore returns saved ShopifyAPI instance for your store
- generateMSpScript generates the text of the added script to initialize and configure the Google map settings
- location provides location settings for the app
- mapstyle contains the map style settings
- generateMspHtml generates HTML for the page template
- googleApiKey offers access to the Google Maps API
or jctest.js

const express = require('express');
const router = express.Router();
const shopifyStoresService = require('../services/shopify-stores');
const constructHelper = require('../services/map-theme-construct-helper');
const mapStyles = require('../services/map-styles');
router.get('/install', function (req, res) {
   var shop = req.query['shop'];
   var scopes = 'read_orders,read_products,read_themes,write_themes,write_content';
   var shopify = shopifyStoresService.install({
       shop: shop, // MYSHOP.myshopify.com
       shopify_api_key: process.env.API_KEY, // Your API key
       shopify_shared_secret: process.env.API_SECRET, // Your Shared Secret
       shopify_scope: scopes,
       redirect_uri: `https://${process.env.APP_URL}/jctest/auth`,
       nonce: '' // you must provide a randomly selected value unique for each authorization request
   });
   //Generate url for the application installation screen
   var installUrl = shopify.buildAuthURL();
   res.redirect(installUrl);
})
Well, in the above mentioned coding we have used shopify-node-api for building installURL by using this command line.
http://${shop}/admin/oauth/authorize?client_id=${API_KEY}&scope=${scopes}&redirect_uri=https://${API_URL}/jctest/auth
Once the Jstest installation is done, developers need to authorize and get the Auth Token for the installed jstest for availing better operation. Authorization can be done by using the below listed coding.
router.get('/auth', function (req, res) {
   let shop = req.query['shop'];
   let shopify = shopifyStoresService.getStore(shop);
   shopify.exchange_temporary_token(req.query, function (err, data) {
       shopify.get('/admin/themes.json', function (err, data, headers) {
           res.render('index', {
               title: 'jc map app',
               appKey: process.env.API_KEY,
               shop: shop,
               themes: data.themes,
               mapStyles: Object.keys(mapStyles)
           });
       });
   });
});
Step 5: Creating An Application Interface
Now, to create the application interface, you will need to use the Embedded App SDK. By this, you will get the complete access to the admin panel and Build A Shopify App
- Modal windows
- Dialog box different notifications, including the warnings and confirmations
- Header panel for placing your logo, buttons and others
- Popups
To make the embedded SDK to be accessible from the app UI, you need to follow the below-listed steps
- Click on “Apps” from the partner dashboard
- Choose the application from the list and click on “Extensions”
- Search for the Embed in Shopify Admin section and click on ENABLE
- Save the changes and close the dashboard
Step 6: Start Application
After making all the necessary changes and saving the settings, you are good to go to start the application.
- Open the terminal window
- Go to application directory and run the npm start
Step 7: Install
Now it is time to install your app on a test store. For this,
Navigate to your Shopify partners dashboard and click on “Apps” to Build A Shopify App
- Click on the name of the app you just created above.
- Click on “Create app store listing” and save.
- Click on the “View app listing”, and your app will load in the Shopify app store.
- Lastly, click on “Get” to install your app to the Test store.
These were the seven steps that you can easily make and Build A Shopify App With Node.js with making the tweaks and get the best response from the potential customers.
Read More: Outsourcing Lessons Learned from Successful Startups

