Hello.! and Welcome to another edition of our blog series where we discuss some of the most common problems, tips & tricks, and the latest trends & innovations related to the field of Information Technology.
Today, we’re going to talk about a topic which will bring all the developers on the edge of their seats. We’re going to shift our focus on Laravel Development Services, and we will discuss what Helpers are, how it works and how we can practically implement that in any web application.
What Is Laravel Helpers?
Laravel Helpers are nothing but some global functions that the developers utilize to save their time for writing the repetitive tasks.
In other words, one can say that Helpers are simple PHP functions which helps the developers to speed up the development process.
You can use this built-in function anywhere within your web application. Therefore, it becomes essential for all of us to have in-depth knowledge of this topic.
Now, let us take an example of Helper which will help you understand this concept in a better way. As you all know that, in any web application, you need to make an SEO-friendly URL.
For that purpose, you make the use of slug. Slug is for creating permalink of each of your posts and web pages. So, for this kind of repetitive task, you can make use of Helpers.
The URL structure will be like:
example.com/users/
Now, without using the concept of Helper, you can create the code for the URL as shown in the snippet below:
$name = 'Abhishek Chakravarty'; $slug = implode('-', explode(' ', strtolower($name)
Instead of this, you can make use of the Helper as shown below in the snippet:
$name = 'Abhishek Chakravarty'; $slug = str_slug($name, '-');
Helpers In Laravel
Laravel includes a variety of global “helper” PHP functions. The framework itself uses many of these functions, but, if you want to use these functions in your applications, you’re free to do that as well.
The developers can use the various Helpers according to the requirement of their application. To know more about the practical use of Helper, you should take laravel programmers for hire for your company.
All of these helpers are grouped based on the functionality they serve. These groups are known as the Helper Groups, and there are five main Helper Groups.
Helper Groups
They are as listed below:
Arrays & Objects
As the name suggests, this Helper Group allows the developer to work with Arrays & Objects. There are many scenarios in web application development, where you need to manipulate an Array. For that purpose, this can be your best bet.
This group contains helper functions to add two arrays, collapse a multidimensional array into a single array, return the first element of the array, check whether a given item or items exist in an array and perform many other types of manipulations.
Strings
String manipulation is something every developer needs to deal with in their daily routine. Although PHP provides you with plenty of built-in string manipulation functions, this Helper Group brings some exciting prospects into play.
You can convert strings to camel case, find the basename of the class, run htmlspecialchars, convert text to kebab case, convert text to snake case and do many other manipulations according to the need of your project.
Paths
It is the most useful Helper Group that you will ever find out. This group of helpers returns absolute paths of different directories in your application like the app, config, public, resource, storage, and your application base path as well.
The most exciting fact about this set of helpers is that you’re already using them, but till now you didn’t know that they are part of the helper group.
URLs
You will find a very few helpers in this category, but all of them will be useful in your application at some point in time. The main functionality of this Helper Group is helping the developers to generate URLs. You can create a URL for the controller action, named route, and fully qualified URL to the given path.
Miscellaneous
This category contains helpers that provide a variety of functionalities such as logging, debugging, page status, service container, authentication, cache, etc.
So far, we have discussed what Helper is, how it works, and what are the Helper Groups which are provided by Laravel. Now, we will explain how you can create your helper who is also known as the custom helper.
Creating Your Helper
In this section, we will give you an in-depth guide on how you create your helper. We will create a helper file which you can use globally in any of your applications.
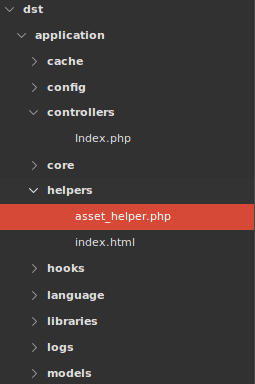
The first thing you should be careful about with the helper file is its placement. You can organize the location of your helper file, but generally, you should prefer to locate the helper project file in app/Helpers/Helper.php.
Creating A Helper File
As discussed earlier, let’s create a Helpers directory under the app and create a Helper.php file.
Once you create the helper file, it’s time to write the code for the Helper.php file. Currently, there are two ways for it: (A) By making the use of class (B) Without using any class
By Making The Use Of Class:–
If you’re making use of class while writing the code of the Helper.php file, then you should not forget to add the namespace in the starting of your file.
namespace AppHelpers
Helper.php File:-
<?php //app/Helpers/Envato/User.php namespace AppHelpersEnvato; use IlluminateSupportFacadesDB; class User { /** * @param int $user_id User-id * * @return string */ public static function get_username($user_id) { $user = DB::table('users')->where('userid', $user_id)->first(); return (isset($user->username) ? $user->username : ''); } }
Without Using Class:-
If you’re not using any class for writing the code of the helper file, then you don’t need to add any namespace declaration in the coding. The reason behind that is, the helper function will automatically become global and so, you can directly access it without namespace.
Helper.php File:-
<?php if (!function_exists('human_file_size')) { /** * Returns a human readable file size * * @param integer $bytes * Bytes contains the size of the bytes to convert * * @param integer $decimals * Number of decimal places to be returned * * @return string a string in human readable format * * */ function human_file_size($bytes, $decimals = 2) { $sz = 'BKMGTPE'; $factor = (int)floor((strlen($bytes) - 1) / 3); return sprintf("%.{$decimals}f", $bytes / pow(1024, $factor)) . $sz[$factor]; } } if (!function_exists('in_arrayi')) { /** * Checks if a value exists in an array in a case-insensitive manner * * @param mixed $needle * The searched value * * @param $haystack * The array * * @param bool $strict [optional] * If set to true type of needle will also be matched * * @return bool true if needle is found in the array, * false otherwise */ function in_arrayi($needle, $haystack, $strict = false) { return in_array(strtolower($needle), array_map('strtolower', $haystack), $strict); } }
There are a few things you need to know about the Helper function that we just defined in the snippet. The first thing that you should know is that all the Helper functions are wrapped inside a check to avoid the collision.
if (!function_exists('human_file_size')) { function human_file_size($bytes, $decimals = 2) { // ... } }
Now, if you skip this check, collision may occur anytime when you redefine the function with a similar definition. Therefore, always remember to use this check OR add a prefix to the function name to avoid the collision.
Using The Helper File
In the previous section, we have discussed how you can create a helper file. But, the question that still needs an answer is, How to use that helper file in your application? So, let’s analyze that in detail.
There are mainly three methods by which you can use the helper in your application:
Autoload Helper File Using The Composer:-
It is one of the simplest and straightforward methods to using the helper file in your web application. Simply go to composer.json file in your project as shown in the snippet below:
{ "name": laravel/laravel", "description": "The Laravel Framework.", "keywords": ["framework", "laravel"], "license": "MIT", "type": "project", "require": { "php": ">=7.0.0", “fideloper/proxy”: “~3.3”, “laravel/framework”: “5.5.*” “laravel/tinker”: ~1.0” }, “require-dev”: { “flip/whoops”: “~2.0”, “fzaninotto/faker”: “~1.4”, “mockery/mockery”: “~1.0” “phpunit/phpunit”: “~6.0” }, “autoload”: { “classmap”: [ “database/seeds”, “database/factories” ], “Psr-4”: { “App”: “app/” } }, “Autoload-dev”: { psr-4”: { “Tests”: “tests/” } }, “extra”: { “laravel”: { “dont-discover”: [ ] } }, “scripts”: { “post-root-package-install”: [ “@php -r file_exists(‘.env’) || copy(‘.env.example’, ‘.env’); “” ], “post-create-project-cmd”; [ “@php artisan key:generate” ], “post-autoload-dump”: [ “IlluminateFoundationComposerScripts::postAutoloadDump”, “@php artisan package:discover” ] }, “config”: { “preferred-install”: “dist”, “Sort-packages”: true, “optimize-autoloader”: true } }
The composer has a file named key (i.e., an array of file paths) that you can use in an autoloaded key as shown in the snippet below:
"autoload": { "files": [ "app/Helpers/Helper.php" ], "classmap": [ "database/seeds", "database/factories" ], "psr-4": { "App": "app/" } },
After changing composer.json file and adding a new path to the files array, you need to dump the autoloader. For that purpose, just run the following command from the terminal.
composer dump-autoload
Now, the helper will automatically load into your project.
Use Service Provider To Load The File:-
It is the second option which you can utilize to use the Helper file in your application. Go to the command line in the root of your application and run the following command to create a new service provider.
php artisan make:provider HelperServiceProvider
Once you run this command, you will see the following message on your console screen.

It means, you have successfully created a service provider. After that, open the file of the service provider where you will see a register method. Now, in that register method, add the path for your Helper file as shown below in the snippet.
public function register() { $file = app_path('Helpers/Helper.php'); if (file_exists($file)) { require_once($file); } }
For those who don’t know, the register method is the one where we include all the dependencies of our project. Now, in a large-scale project, it is possible to have multiple helpers files in a directory, so you need to acquire all of them.
You can change the code of the register method as shown below which will help to set up your service provider in such a way that it will load all the files in the Helpers directory.
public function register()
{
    foreach (glob(app_path() . '/Helpers/*.php') as $file) {
        require_once($file);
    }
}
Once you complete the service provider, you need to register it. The reason behind that is, it will convey the Laravel to load during the bootstrapping. Now, for registering the service provider, go to config/app.php file and add the following line at the end of the service provider array.
AppProvidersHelperServiceProvider::class,
One more thing you need to be careful about is that, if your helper file has the involvement of class & you’ve specified the namespace for that, then you could use them just by defining the alias as shown in the snippet below.
'Helper' => AppHelpersHelper::class,
By doing this, you can now directly call the helpers with the ‘Helper’ keyword.
Read also: Laravel Lumen: An In-Depth Guide
Use A Third-Party Package:-
Last but not the least method of using the Helper file in your application is by using a third-party package. For that purpose, you can go to the GitHub page for Laravel helpers package and download it.
You can install that package by running the following command from the root of your application.
composer require browner12/helpers
Once you complete this process, it’s time now to add the following line in the provider’s array.
browner12helpersHelperServiceProvider::class,
If you’re using automatic package discovery functionality, then you can skip the above step. After completing the necessary steps, use the following command to create the Helper file.
php artisan make:helper Helper
Helpers In Action
Once you’ve defined all the functions that you’re going to use in the Helper file, we could use them with the utmost ease. For that purpose, go to your routes file at routes/web.php and use this function for the home page route.
routes/web.php file:
<?php Route::get('/', function () { return human_file_size(1024*1024); });
It will only return a human-readable size of the number of bytes passed as the parameter. You could call these functions from anywhere, controllers or views.
Conclusion
In today’s day & age, when Laravel framework is ruling the roost in the IT world, it becomes essential for all the developers to have in-depth knowledge regarding each & every functionality of it.
In this blog, we have discussed the concept of Helpers, how it works and how you can create custom Helpers. We hope you had a great time reading this article.
After reading this article, you will be aware of the Helpers that can help any Laravel Development Company in future projects. Thank You.!


